
The undeveloped land around our house where I spend time tracking, hiking and studying.
In the first nature study post, I talked about finding a ‘sit spot’; someplace near where you live or work where you can spend some uninterrupted time observing the natural world. Your spot doesn’t have to be remote or in an undeveloped area. Quite the opposite – I would like your sit spot to someplace you already connect with and want to learn more about through this program.
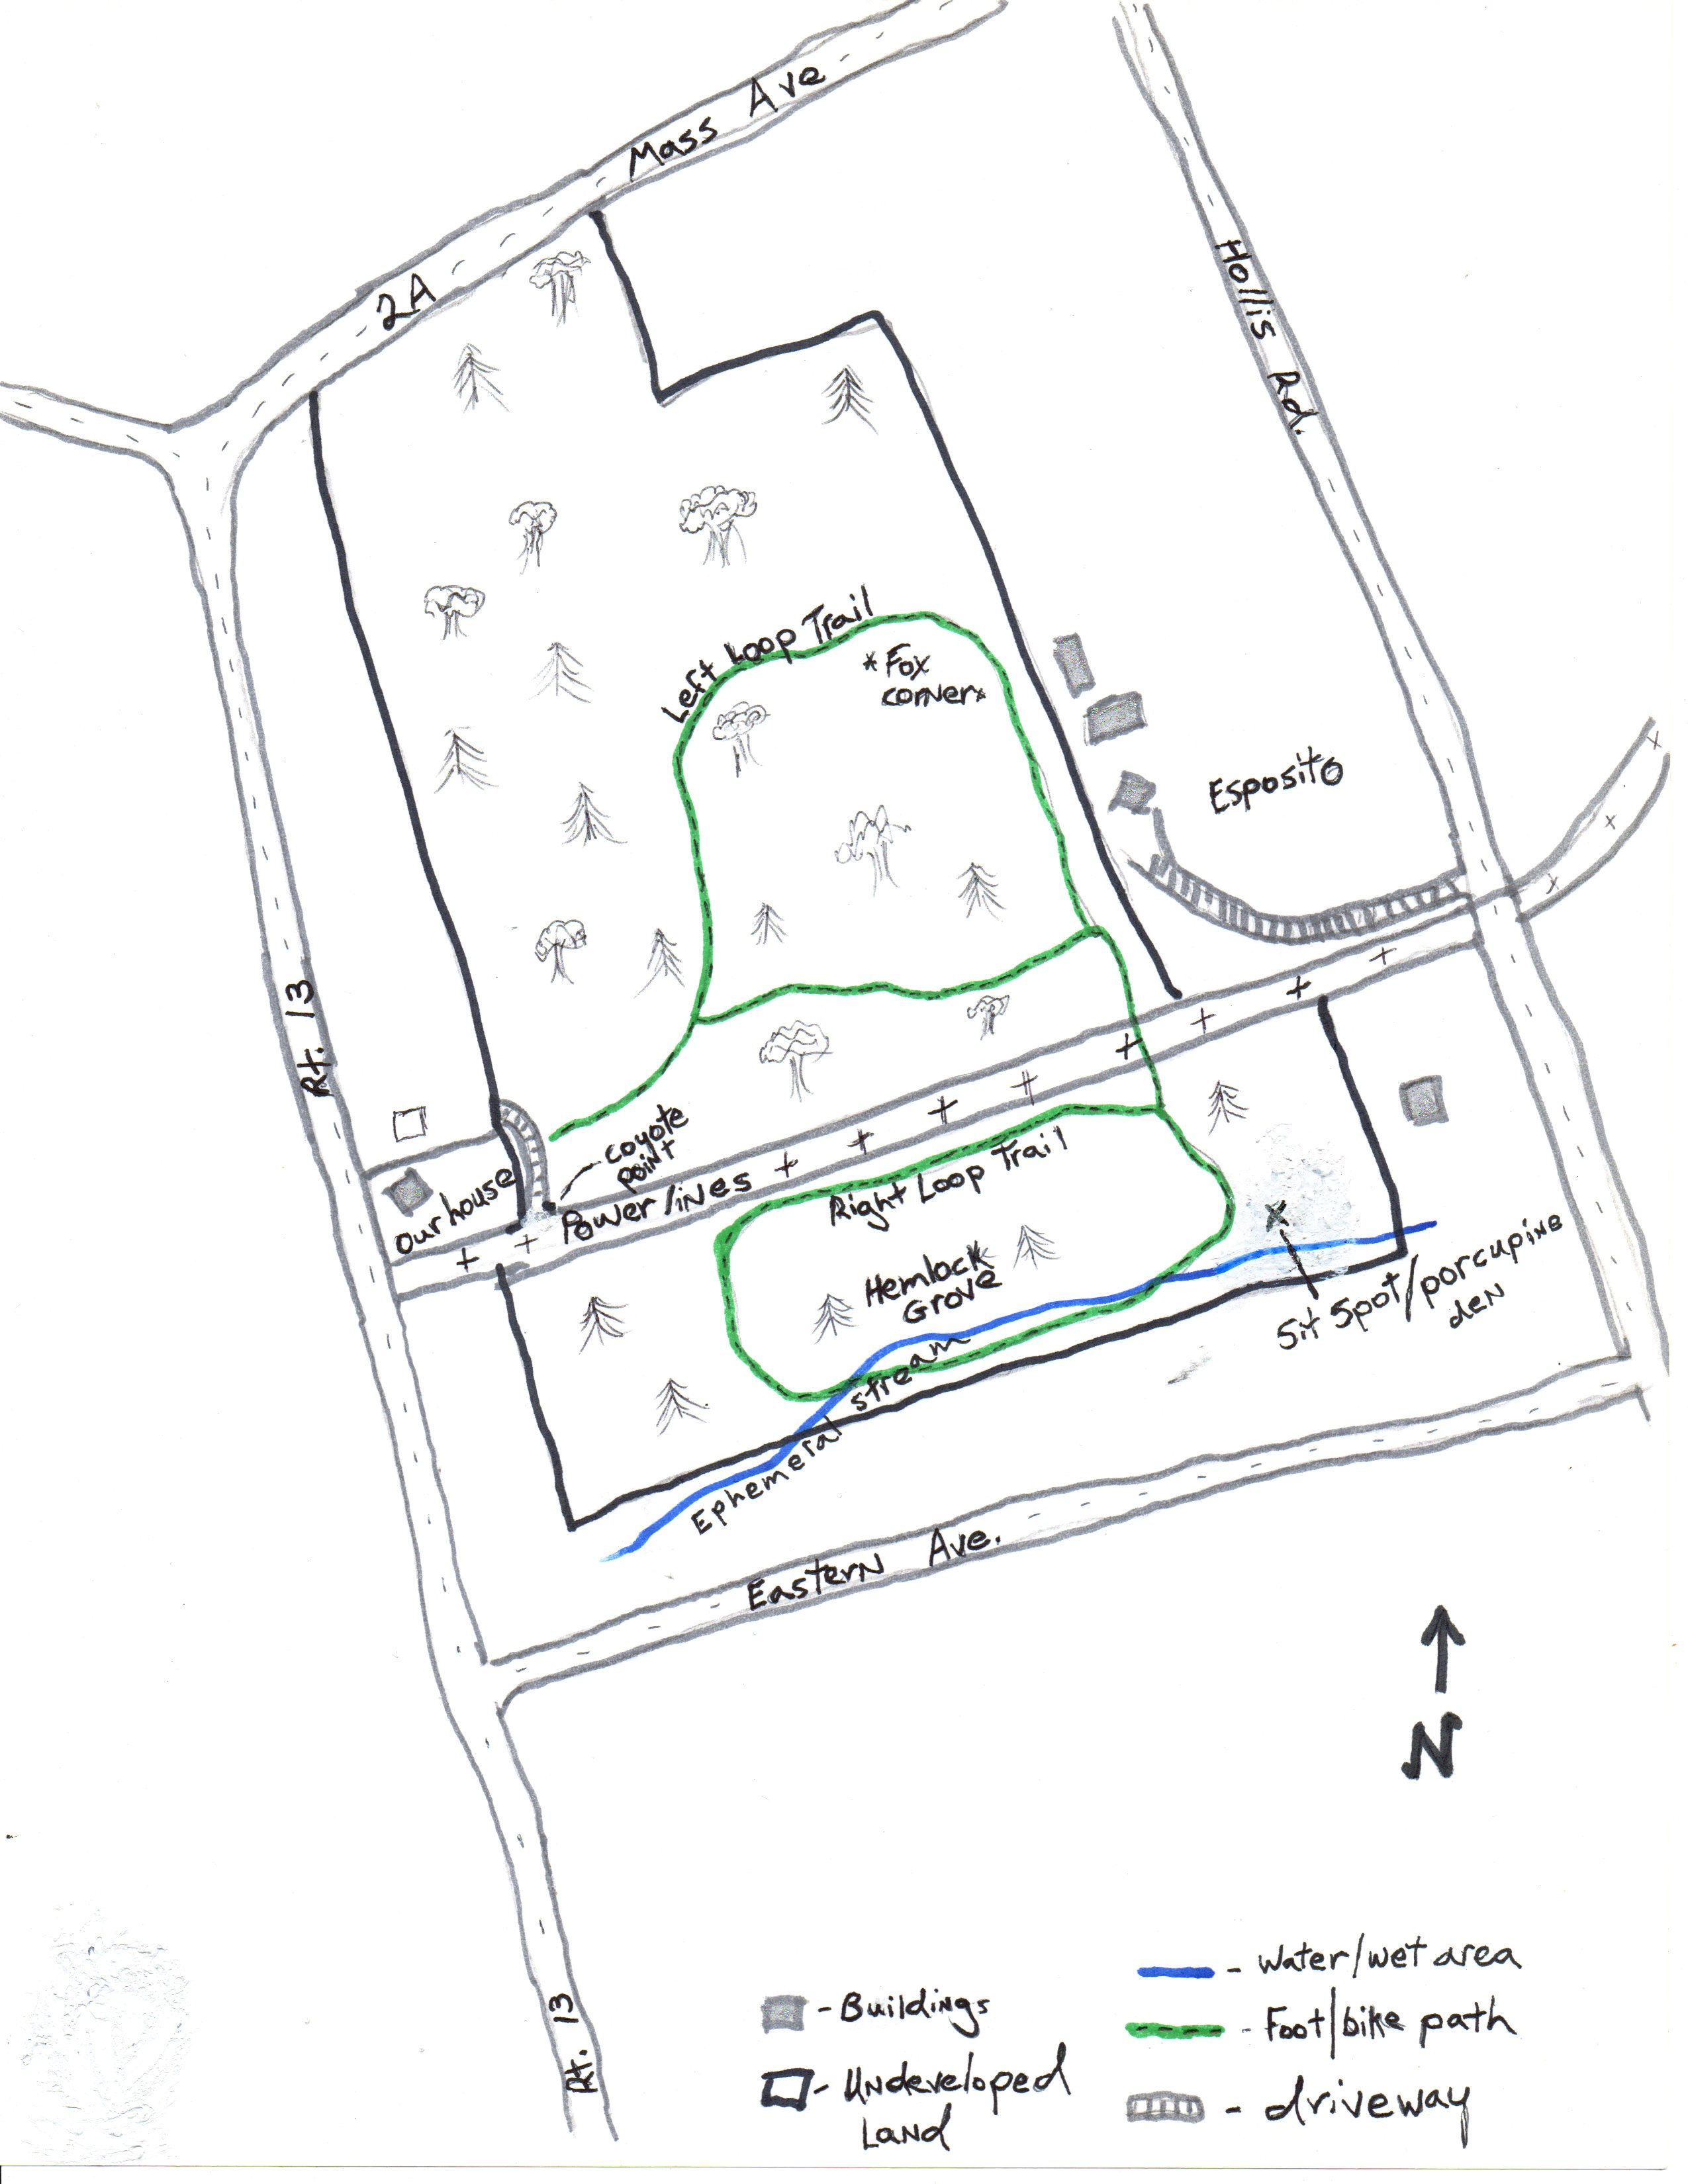
We’re going to work on mapping the place around our sit spot for this lesson. Mapping doesn’t have to be anything formal – hand drawn maps are best, but if you feel you really can’t manage one, you can use Google Maps or Google Earth to zoom in and create a base for your map. You can also create one electronically, if you’re so inclined. For the map I drew above I used Google Maps to zoom to the properties surrounding ours and then hand-drew what I was looking at. My drawing skills are limited at best (as I’m sure you can tell) so don’t feel like yours has to be any kind of perfect. In fact, mine is a work in progress – I’ll publish another copy in a later lesson so you can see how it develops.
Why map your place? The act of actually drawing or creating a map of any place forces us to take a closer look at what’s around us. And the creation process itself cements things in our brains differently than just observing. You will deepen your sense of place through this view, and will come to know the natural world better for i t.
t.
What should you map? Basic features of the landscape around you will help you get oriented both on the ground and on paper and give you a base to work from. This can be as detailed or rough as you wish. Then add the things that make your place special to you. If you are mapping your backyard, for example, you might note your special sit spot, locations of wildlife you regularly observe, bird feeders, particular plants or trees that make your space special, and anything else you want to note or keep track of.
In my map above you can see I’ve labeled a few places: Coyote Point is where I often see coyote scat, and my neighbor saw a single coyote there last year looking at our yard (or rather, our chicken coop). Fox Corner is a bend in a footpath where I nearly always see some sign of foxes: scat, tracks and urine scent marks are there most of the year. I’ve also noted my sit spot, named the footpaths that go through the properties, and noted a few natural features: a stream, and a grove of hemlock trees. Noting and naming these markers not only help me connect to the land, but also serve as reference points when I’m journaling, or taking field notes.
As you progress through the class (or any nature study on your own) you may find that you want to add to your map over time. Or you may wish to use your map as a visual journal of your experiences and observations. At its basic level, it is your starting point for continuing forward with your nature studies.
Do you have a special sit spot for nature watching yet? Share your space in the comments below, I’d love to hear about where people are studying. And if you create a map between now and next lesson, share that with us as well.
What a great idea… I should add a map to my nature journal. Thank you for the lesson…. Michelle
If you do add a map, let me know if you upload it to your blog!